Carpentry and Cabinet Design and restoration Projects. I Like to work with materials found at hand . Like the kitchen unit i built from parts found in the clients House.
Thursday, 6 October 2016
Friday, 27 November 2015
Bathroom / Badkamer Nijmegen.
Monday, 13 October 2014
Shed conversion to spare room / Mini dance hall !
In The picture ( right ) you can see that we put the finished sections inbetween the roof beams.
This was to bring out the roof beams as a feature. It was a long task to make each one individually.
Overall the finished room is warm and cosy and a great addition to the adjoining house.
Second Shelving Unit Project
This is the second unit i built for my client. Both projects were from Veneered Multiplex (plywood) This one was oiled to bring out the wood grain. I made this from 2.4m x 1.2 sheets cut up using my hand operated circular saw. It was real tight squeeze assembling it in the room. We had to add the bottom rail for extra rigidity and i put two more dividers in the top to make three sections instead of one.
Some careful measuring ensured that the shelf sides aligned with the tiles next to the sink and that the sink fits into the unit. I built the unit around the existing sink.
The built in curtain rail allows all of the contents to be hidden away. This also means that there are no large doors extending into the room when open. The curtains are a good solution allowing quick access to the sink and the shelves.
Some careful measuring ensured that the shelf sides aligned with the tiles next to the sink and that the sink fits into the unit. I built the unit around the existing sink.
The built in curtain rail allows all of the contents to be hidden away. This also means that there are no large doors extending into the room when open. The curtains are a good solution allowing quick access to the sink and the shelves.
Shelving and Cupboard Project
Here is a bedroom project reworked from an existing wardrobe and shelving unit. We removed the shelving unit and replaced it with this longer version. The wardrobe on the right of the window was extended.
This is the extended wardrobe. I made it deeper ( front to back ) by 20 cm or so. So that it comes flush with the bathroom door Trim. This gives more storage space. It did mean taking the whole thing apart extending the side. I reassembled it along with connecting trim to the shelving unit on the left of the window.
In the photo above you can just see the whole finished project with the new curtain rails added.
This is the extended wardrobe. I made it deeper ( front to back ) by 20 cm or so. So that it comes flush with the bathroom door Trim. This gives more storage space. It did mean taking the whole thing apart extending the side. I reassembled it along with connecting trim to the shelving unit on the left of the window.
In the photo above you can just see the whole finished project with the new curtain rails added.
Wednesday, 1 October 2014
Freestanding custom bed for mobile home
This is the space i was asked to make a bed for. Its not quite 2 meters long. The bed had to be 1.4 m wide.
These are the legs. I cut these by hand so the sides and ends would have shoulder to sit on to add extra strength.
Cutting along the grain is always tiring , more so with a less than a new saw !
The finished bed frame. Note how there is no proper foot end or head board due to the width being so small ! The walls work just as well for a head board in this mobile home! It also means that the mattress will fit on the base !
These are the legs. I cut these by hand so the sides and ends would have shoulder to sit on to add extra strength.
Cutting along the grain is always tiring , more so with a less than a new saw !
![]() |
| Here you can see the shoulders more clearly. |
![]() |
| From this photo you can see how the sides and ends attach to the legs. |
Fairy tree porch from Old Oak
I made this porch from old oak trees selected for their shapes and flowing lines. The idea was to create a rain shelter that had a natural look to the construction while providing a roof that is water tight.
This is the detail shot of the corners with its interlocking poles. I love how it looks. It took a lot of work to strip and oil the poles which were cut from standing dead oak saplings.
I used roofing batons to hold the posts firm while i tied in the main roof supports.
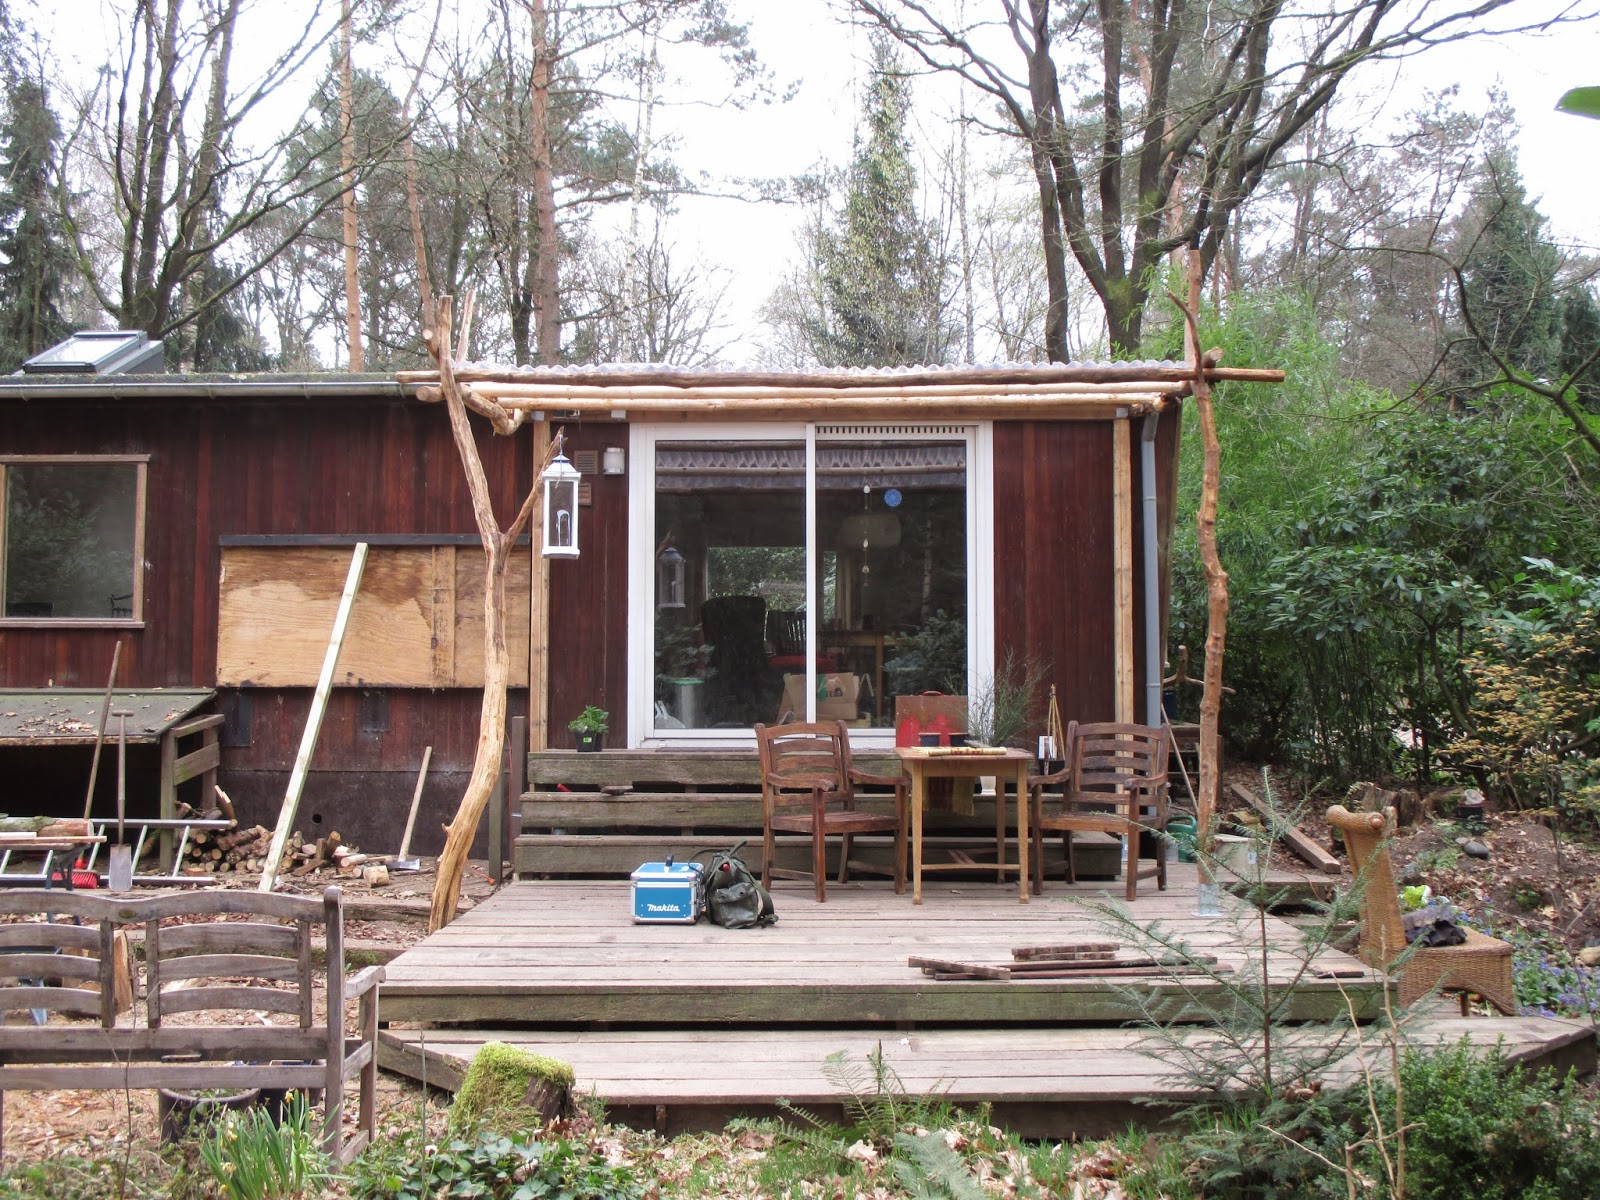
It wasn't so easy getting the roof level or the posts true ! I am so happy with the finished result though ! Luckily, so is the customer !
Even though none of the poles are straight The roof is level from left to right across the length and pitched correctly for water run off from top to bottom.
This is the detail shot of the corners with its interlocking poles. I love how it looks. It took a lot of work to strip and oil the poles which were cut from standing dead oak saplings.
I used roofing batons to hold the posts firm while i tied in the main roof supports.
Even though none of the poles are straight The roof is level from left to right across the length and pitched correctly for water run off from top to bottom.
Subscribe to:
Posts (Atom)


.jpg)
.jpg)
.jpg)
.jpg)
.jpg)
.jpg)
.jpg)
.jpg)
.jpg)
.jpg)
.jpg)
.jpg)
.jpg)
.jpg)


